How the New XanMod Kernel 6.18.23 and 6.19.13 Actually Improve Daily Linux Performance
The latest XanMod kernel releases bring targeted optimizations that matter for desktop responsiveness and network throughput. Readers will learn which features actually help everyday workflows, how to install the packages safely, and where third party drivers might break things. Skipping the usual kernel hopping pitfalls keeps systems stable while still gaining those performance bumps.
Why swap to a custom kernel in the first place
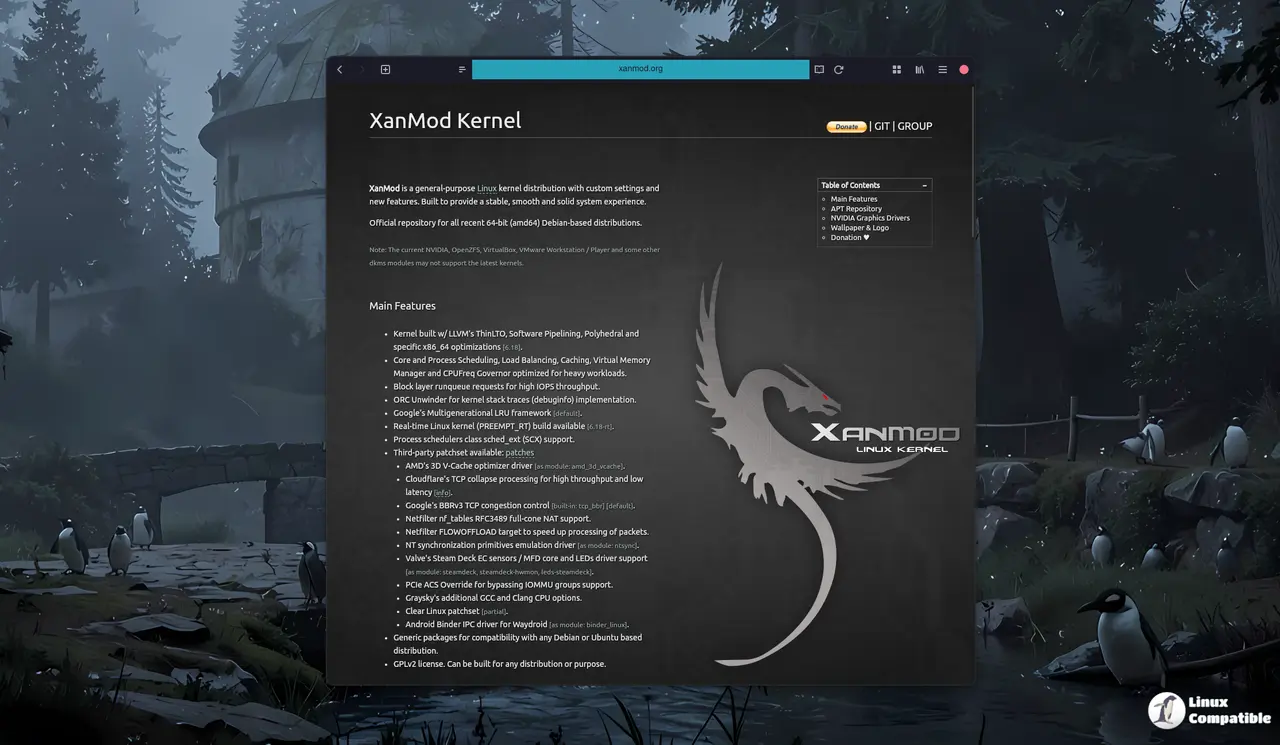
Kernel hopping often feels like a magic fix, but most desktop users just need stability rather than microbenchmarked scheduler tweaks. XanMod strips out unnecessary background polling and applies aggressive scheduling adjustments that make the system feel snappier during heavy multitasking. The build process uses LLVM ThinLTO and software pipelining to squeeze extra cycles out of modern x86_64 processors without requiring manual overclocking. It also ships with Google multigenerational LRU as the default memory manager, which handles RAM pressure much better than older eviction algorithms. If a machine feels sluggish after opening twenty browser tabs or compiling code, these background adjustments often fix the stutter without touching hardware. Anyone who has survived a bad Windows driver rollout knows how quickly things can go sideways when updates ignore real world usage patterns. The same rule applies here, which is why sticking to tested custom builds matters.
What actually changed in these releases
Version 6.18.23 and 6.19.13 focus on refining existing optimizations rather than adding flashy new features. The block layer runqueue now handles high IOPS workloads more efficiently, which helps when reading or writing large datasets across NVMe drives. Network stacks get Cloudflare TCP collapse processing and Google BBRv3 congestion control by default, meaning faster downloads and lower latency for streaming or remote desktop sessions. AMD processors with 3D V-Cache technology finally get a dedicated module that optimizes cache allocation for gaming and rendering tasks. Steam Deck hardware support lands as loadable modules too, bringing EC sensor readings and LED controls to compatible handhelds without patching the mainline tree. These changes stay under the hood but directly impact how smoothly applications respond during peak usage.
Installing the XanMod kernel safely
Adding the repository requires verifying the package signature first, which prevents malicious updates from slipping into the system. Users should download the archive key and store it in the secure keyrings directory before touching any source lists. The installation command pulls the x64v3 variant by default, which targets modern processors with AVX2 support and skips older CPU instructions that waste space on recent hardware. Running apt update followed by the install package command fetches the precompiled binaries directly from the official server. External module builders need dkms, libelf-dev, clang, lld, and llvm installed beforehand, since custom kernels often require recompiling out of tree drivers. A quick reboot after installation applies the new scheduler and memory management routines immediately. Skipping the dependency check usually results in failed driver builds that leave virtualization or graphics tools completely broken.
First, bring the PGP key into APT’s trust store so it can verify every package that rolls out. Running the command below fetches the key and writes it to the appropriate directory; doing this before adding the repository protects you from man‑in‑the‑middle attacks on the kernel packages.
wget -qO - https://dl.xanmod.org/archive.key | sudo gpg --dearmor -vo /etc/apt/keyrings/xanmod-archive-keyring.gpg
Next, drop a repository file into sources. The line below is already tuned for the distribution you’re on; it automatically expands to the correct codename thanks to lsb_release. Once that file is in place, APT knows exactly where to pull the kernel packages from.
echo "deb [signed-by=/etc/apt/keyrings/xanmod-archive-keyring.gpg] http://deb.xanmod.org $(lsb_release -sc) main" | sudo tee /etc/apt/sources.list.d/xanmod-release.list
Finally, update the package list and install the kernel. The --no-install-recommends flag keeps the installation lean by only pulling essential dependencies; you’ll still need a few development packages if you plan on compiling any external modules later.
sudo apt update && sudo apt install linux-xanmod-x64v3
NVIDIA and third party module warnings
Proprietary graphics stacks and virtualization tools frequently lag behind kernel updates because they rely on internal interfaces that change without warning. The current XanMod builds ship with NVIDIA driver repositories offering version 595.58.03 and 580.142, but those packages only work reliably when the matching dkms modules are available. Desktop support forums regularly fill with reports of machines losing display output after a kernel jump because users install the new headers without checking module compatibility first. OpenZFS, VirtualBox, and VMware Workstation all face similar timing issues where the upstream maintainer has not yet patched their code for the latest API changes. Checking the official release notes before upgrading prevents hours spent troubleshooting black screens or broken network bridges. The XanMod kernel delivers real performance gains for users who actually need them, but it demands a bit more attention during updates. Stick to the provided installation steps, verify module support for proprietary software, and enjoy the smoother desktop experience. Happy tinkering.
