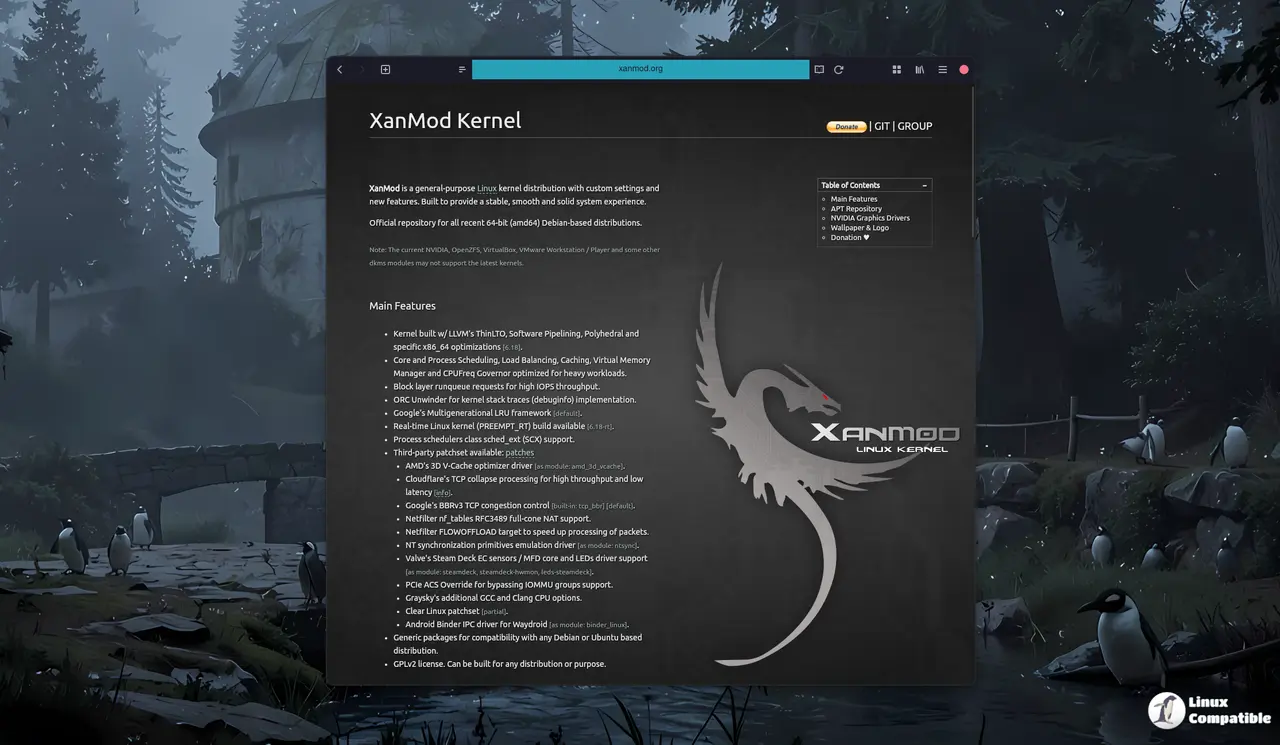
The XanMod kernel offers improved performance with its block-layer runqueue tweaks and revamped scheduler, resulting in smoother multitasking. It also includes aggressive x86_64 optimizations from LLVM's ThinLTO for better I/O boosts. For low-latency workloads like audio production, robotics, or gaming, the linux-xanmod-rt package is available, which ships a PREEMPT_RT-enabled kernel based on 6.18 with deterministic scheduling. The XanMod kernel is compatible with various drivers, including NVIDIA and VirtualBox, although some may require reinstalling under new headers to work properly.
How to Install XanMod Kernel 6.18.10 on Debian‑Based Systems
The newest XanMod kernel ( 6.18.10) and its LTS sibling 6.12.70 are now available for any amd64 Debian or Ubuntu derivative. This guide shows exactly what you need to pull the package from XanMod’s repo, get it running, and avoid the common pitfalls that trip up users who rely on DKMS drivers like NVIDIA or VirtualBox.
Register the repository key
First, fetch XanMod’s signing key and drop it into /etc/apt/keyrings. The command streams the key directly to gpg --dearmor, producing a binary keyring file that apt can verify. Skipping this step will cause the package manager to reject the repo with an “unauthenticated” warning.
wget -qO - https://dl.xanmod.org/archive.key | sudo gpg --dearmor -vo /etc/apt/keyrings/xanmod-archive-keyring.gpg
Add the APT source
Next, construct a one‑liner that writes a new entry to /etc/apt/sources.list.d. The $(lsb_release -sc) part automatically expands to your distro’s codename (bookworm, noble, etc.), so you don’t have to edit the line manually. Forgetting the signed-by= clause will make apt ignore the key you just installed.
echo "deb [signed-by=/etc/apt/keyrings/xanmod-archive-keyring.gpg] http://deb.xanmod.org $(lsb_release -sc) main" | sudo tee /etc/apt/sources.list.d/xanmod-release.list
Update the package index and install
Run a normal update, then ask apt for the linux-xanmod-x64v3 meta‑package. This pulls the kernel binaries, initramfs tools, and a minimal set of modules that match the default XanMod configuration. The “x64v3” flavour includes LLVM’s ThinLTO and aggressive x86_64 optimizations, which is why it shows up as the recommended choice in the release notes.
sudo apt update && sudo apt install linux-xanmod-x64v3
Prepare for external modules
If you rely on DKMS drivers—NVIDIA’s proprietary blob, OpenZFS, VirtualBox, or VMware Workstation—install the build essentials before rebooting. Without clang, lld and libdw-dev the kernel’s new symbol tables won’t line up with older driver sources, leading to “module not found” errors during boot.
sudo apt install --no-install-recommends dkms libdw-dev clang lld llvm
Reboot into XanMod
A simple restart is all that’s needed. The GRUB menu will now list a “XanMod 6.18.10‑x64v3” entry; select it if you want to test before making it the default. Users who skipped the DKMS step often report a black screen after the NVIDIA driver fails to load—rolling back to the stock kernel from the GRUB submenu fixes that quickly.
What to watch out for
A handful of community reports note that VirtualBox’s host‑only networking module refuses to compile against the new VFS layout introduced in 6.18. The workaround is to reinstall VirtualBox after the reboot; the post‑install script rebuilds the kernel modules with the fresh headers. Similarly, some older NVIDIA driver versions (pre‑525) refuse to sign their modules under the newer Secure Boot defaults, so either disable Secure Boot or upgrade the driver.
Optional: Grab the real‑time build
For anyone needing low‑latency workloads—audio production, robotics, or gaming—the linux-xanmod-rt package ships a PREEMPT_RT‑enabled kernel based on 6.18. It’s heavier than the vanilla flavour but offers deterministic scheduling out of the box. Just replace x64v3 with rt in the install command and reboot.
That’s it. The XanMod kernel should now be humming along, delivering the promised I/O boost from its block‑layer runqueue tweaks and the smoother multitasking thanks to the revamped scheduler. If a driver refuses to cooperate, reinstall it under the new headers; otherwise enjoy the snappier desktop without digging through endless forums.
